Blurry Night Footage? Why Camera Placement Beats Megapixels
October 5, 2026
QUICK ANSWER: Blurry night footage is rarely a resolution problem. It usually comes from a camera mounted too high, aimed at the wrong angle, facing a light source, or sitting too close to something that bounces infrared glare back into the lens. Fix the mounting height, the angle, the lighting, and the distance to the subject first. Buying a camera with more megapixels will not repair any of those, and often makes low light footage worse.
Ask ten people how many cameras a property needs and you will get ten different answers, usually delivered with total confidence. One neighbor swears by a single doorbell camera. Another has eleven cameras and still cannot tell you what happened to the package that vanished last week. Both are guessing, and both have a point. The right number is not a fixed figure. It is the answer to a few practical questions about your property, and once you know how to ask them, the count tends to become obvious.
We have spent more than a decade designing video surveillance for homes, shops, warehouses, and ranches across the Metroplex, and the same mistake shows up again and again. People start by picking a number, then try to fit their property around it. We work the other way. We start with the property, and let the cameras follow.
Why Megapixels Do Not Fix Night Footage
Resolution describes how many tiny dots make up a picture. At noon, with bright sun on your driveway, more dots mean more detail, and the number on the box matters. At night, the story changes, because the camera is starving for light.
Every camera sensor is a grid of small light catchers. When a manufacturer packs more of them onto the same size chip, each one gets smaller and collects less light. In daylight that tradeoff is invisible. In a dark side yard, it means more grain, more noise, and a camera that has to work harder to produce any picture at all. A modest resolution camera with a larger light catching surface and a good lens often beats a high resolution camera on a crowded chip once the sun goes down.
There is a second issue that has nothing to do with the sensor. Even a perfect picture is useless if the subject is too far away, too small in the frame, or lit from behind. Megapixels cannot add light that never reached the lens, and they cannot rescue a face that was only a dozen pixels wide to begin with.
What The Box Does Not Tell You
Lens quality, sensor size, noise processing, and infrared illumination design all affect nighttime performance. These important factors rarely appear in headline specifications or marketing claims.
What Actually Decides The Result
Distance, viewing angle, available light, and glare determine results. Each factor depends on placement, meaning careful installation can directly improve nighttime camera performance and image quality.
How Night Vision Actually Works, and Where It Goes Wrong
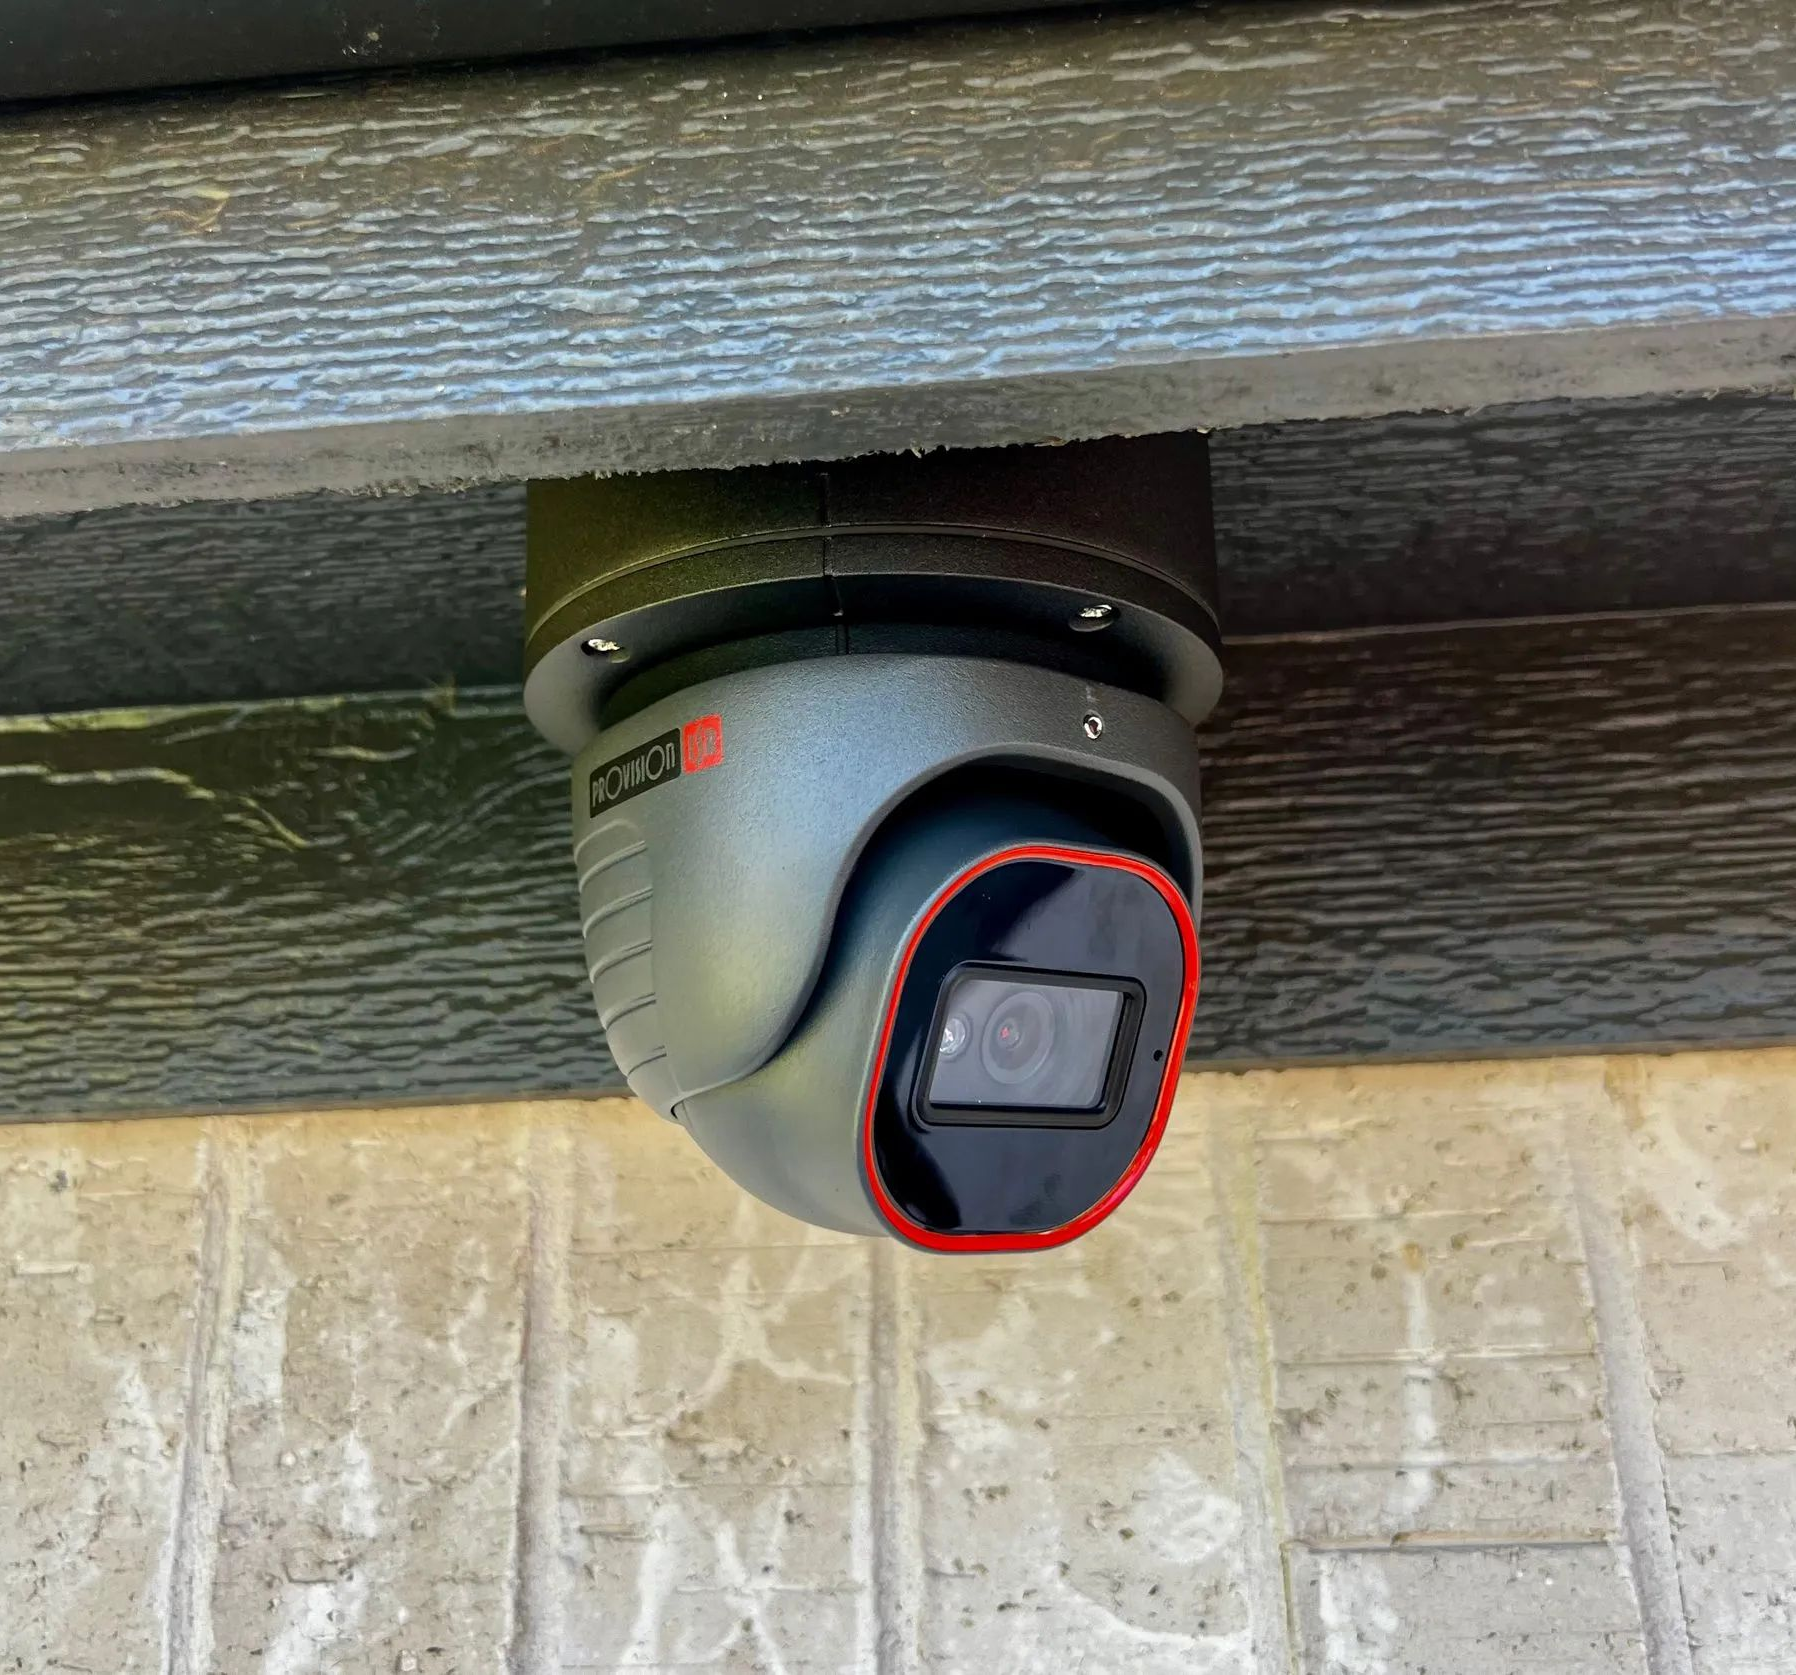
Most outdoor cameras switch into a night mode when the light drops. A small mechanical filter slides out of the way, and the camera starts seeing infrared light that the human eye cannot. Rings of infrared LEDs around the lens, which you can sometimes see glowing a faint red, flood the scene with that invisible light. The camera then produces a black and white picture.
That system works well when the infrared light travels out, hits a subject, and returns to the lens cleanly. Trouble starts when something nearby catches that light first. Here are the most common culprits we find on service calls, including water and dust in front of the lens, which scatter infrared light during storm season.
Glare From A Close Surface
A camera under a shallow eave, tight against a soffit, or beside a light wall can bounce infrared light back into the lens, creating halos.
Spider Webs And Insects
North Texas summers bring abundant bugs, while spiders gather around infrared cameras. Webs become glowing streaks, and insects appear as bright dots. Check the lens closely.
Mounting Height and Angle Matter More Than Anything on the Spec Sheet
Of all the placement choices, height and angle create the biggest difference in night footage, and they are the ones people get wrong most often.
Too High
Cameras mounted too high often capture the tops of heads instead of faces. Steep downward angles make identification difficult, especially at night when limited lighting and detail reduce image quality even further.
Too Low
Cameras mounted within easy reach can be bumped, covered, repositioned, or stolen. Low placement may also create distorted upward views. Keeping cameras accessible is not worth sacrificing security, reliability, and useful footage.
The Useful Middle
For identification, cameras should sit high enough to discourage tampering but low enough to capture faces naturally. Entry cameras generally work best slightly above head height, angled gently toward where people actually approach.
Angle To The Path Of Travel
A camera facing someone approaching captures a clearer face than one positioned across their path. At doors and gates, aim cameras along the approach route rather than sideways to improve identification opportunities.
Distance To The Subject
Infrared can show movement across a yard, but identifying someone requires closer, well-lit footage. Using a wide camera for detection and another closer camera for faces can provide better coverage at entry points.
Lighting: The Easy Improvement Most People Skip
Night footage improves dramatically when there is some real light on the scene, and the type of light matters.
Infrared night mode produces black and white footage with no color. That means you cannot tell the color of a vehicle, a jacket, or a shirt, which are often the details that matter most when describing an event to someone later. Visible light on the scene lets many cameras stay in color mode and capture those details.
Motion Activated Lights
Motion activated lights alert visitors they have been noticed while illuminating subjects for security cameras, improving visibility when movement occurs nearby.
Low, Steady Lighting At Entry Points
Soft, even lighting near doors and gates gives cameras stable scenes, often producing clearer images than harsh floodlights.
Aim Lights Away From The Lens
Never aim lights directly at cameras. Position fixtures beside or above cameras, illuminating subjects without washing out images through backlighting.
TIP: Walk your property after dark with your phone's camera app open. Hold it where your security camera is mounted and look at the view. Anything that glows, glares, or disappears into shadow on your phone will do the same on your camera.
Backlighting and Streetlights
Many of the worst night pictures come from a single bright source in the frame. A streetlight at the end of the driveway, a neighbor's floodlight, or the headlights of a passing car can force the camera to adjust for that one bright spot. The rest of the scene falls into darkness, including the person you wanted to see.
Better cameras have a feature that balances bright and dark areas in the same frame, but even those have limits. The best fix is placement. Aim the camera so the brightest light source is behind it or off to the side, not in front of it. A camera that looks toward the street at night will fight every set of headlights. A camera that looks along the house toward a lit entry has an easier job.
Motion Blur and Fast Subjects
Another reason night footage looks smeared is shutter speed. In low light, a camera lengthens its exposure to gather more light. That is fine for a parked car and terrible for a person walking or a vehicle rolling through a gate. The longer the exposure, the more a moving subject smears.
Placement helps here too. A camera positioned where people naturally slow down, such as at a door, a gate keypad, or a bend in a walkway, captures a moving subject at their slowest. A camera aimed at a long open stretch, where a person or vehicle crosses at speed, captures the worst blur. If you need license plates at a gate, the camera should sit where vehicles are slowing or stopped, and at an angle that does not require reading a plate sliding sideways across the frame.
Placement Choices That Are Specific to DFW Properties
North Texas adds its own set of conditions that affect how a camera performs at night.
Heat
Summer afternoons can overheat outdoor cameras, increasing electronic noise at night. Shade from an overhang or protection from direct western sun helps maintain stable performance. We consider sun exposure before selecting each mounting location.
Hail And Storm Exposure
Spring storms bring hail, wind, and driving rain. Mounting cameras beneath deeper eaves can provide protection while avoiding glare. The goal is balancing weather protection with clear visibility and dependable image quality.
Rural And Ranch Properties
Rural properties often have long driveways, distant gates, open pasture, and limited nighttime lighting. Instead of relying on one camera, plan coverage around gates, barns, and approaches, with appropriate lighting for each location.
A Simple Way to Diagnose Your Own Footage
If your current night footage is disappointing, you can often figure out the cause before calling anyone.
First, look at the footage from the same camera by day. If daytime footage is sharp, resolution is not your issue. If it is soft by day as well, the lens may be dirty, out of focus, or aimed too far from the subject.
Second, look at the subject. If people appear as dark silhouettes against a bright background, backlighting is the problem. If they appear as glowing white figures with no features, the subject is too close to the infrared source or the camera is overexposing.
Third, notice where the camera sits relative to the subject. If it is high and looking steeply down, or off to the side of the path, the angle is the issue.
WARNING: Do not climb a ladder in the dark or in wet conditions to adjust a camera. Check the mount and angle in daylight, and call a professional for anything out of safe reach near a roofline.
When a Camera Does Need Replacing
We do not want to suggest that equipment never matters. Some cameras are simply not built for low light. Older models with weak infrared illuminators, tiny sensors, or poor lenses will struggle no matter where they are mounted. Cameras that failed after years of Texas heat may have a degraded sensor or illuminator, and a camera that was designed for indoor use and then placed outside will not hold up.
The key is to move in the right order. Fix the placement, lighting, and glare first. If footage is still poor after those are addressed, the equipment is the next suspect. Doing it in reverse means swapping in new cameras and then discovering that the same bad mounting spot ruins the new picture as well.
What a Good Night Setup Looks Like
When we design video surveillance for a DFW property, the night picture is part of the plan from the first walkthrough, not an afterthought. A well planned setup tends to share a few traits.
Each camera has a clear job, whether that is spotting arrivals or identifying faces. Entry points get a closer camera mounted at a natural angle, pointed along the approach. Lighting is planned alongside the cameras, so the scene has enough light to keep color and detail. Mounts are solid, shaded where possible, and set out from nearby surfaces so infrared does not bounce back. Lenses are easy to reach for cleaning in daylight. And the whole arrangement is checked after dark, not just on installation day when the sun is still out.
That last step matters most. A camera that looks fine at 3 in the afternoon tells you nothing about how it behaves at 3 in the morning. We test at night because that is when the footage counts.
Is it safe to mount a TV over a fireplace?
Yes, with the right precautions. Heat off the firebox, wall structure, and viewing angle all need checking first. A gas or electric unit with managed heat can run for years. Wood-burning fireplaces with no heat plan cause trouble.
How far above the fireplace should the TV be mounted?
A common range is 8 to 12 inches between mantel top and screen bottom, though it shifts with your fireplace and wall height. The hotter the unit, the more clearance you want, keeping the screen above rising heat.
Can the heat from my fireplace really damage a TV?
It can, usually slowly. Most sets are rated up to 100-104 degrees, and unmanaged fireplace walls can climb past that. Over time this shows as dead pixels, a warped bezel, or shutdowns. Managing heat prevents it.
Do I need a special mount for a TV over a fireplace?
Most of the time, yes. A fixed mount aims the screen over your head. A tilting mount angles down toward viewers; full-motion arms pull out and down. The right choice depends on screen size and wall height.
Can I hide the wires if my fireplace is brick or stone?
It's harder than drywall but doable. Masonry rarely has an open cavity, so the path must be planned before mounting. Options range from in-wall routing to low-profile surface channels. Mapping the route first avoids disruptive retrofits.
Should the TV be bigger or smaller than the fireplace?
As a rule, match the firebox width or go slightly smaller, keeping the wall balanced. Oversized panels over narrow hearths are common now, but proportion makes the wall read as one clean focal point, not competing elements.
Frequently Asked Questions
Will a higher resolution camera fix my blurry night footage?
Usually not. Night footage depends on how much light reaches the sensor, subject distance, and glare. A higher resolution camera on a small chip can look worse in the dark. Fix placement and lighting first.
Why does my camera footage look fine in the day but bad at night?
Daylight hides most placement problems. At night the camera switches to infrared, which exposes glare from nearby surfaces, spider webs, insects, and subjects that are too far or poorly lit.
Can I use a camera behind a window for night viewing?
Not well. Infrared light reflects off glass and bounces back into the lens, turning the picture into a bright glare. A camera placed outside under cover works far better than one shooting through a window.
Do I need extra lighting if my cameras have night vision?
Night vision shows that something is there, but visible light reveals details, including color. For entry points, a motion activated or steady light makes a big difference and lets visitors know they were noticed.
How high should I mount a camera for the best night footage?
For identifying faces, mount above head height, out of easy reach, and angled slightly down. For wide detection across a yard, higher is fine. Either way, keep the lens away from walls.
How often should I clean my outdoor security cameras?
Check about once a month, and more often in summer when insects and spiders are active. Wipe the lens gently, clear webs from the housing, and confirm nothing has grown in front of the camera.
Place Cameras Smartly and See Clearly After Dark
Better night footage almost never starts with a bigger number on a box. It starts with knowing where light falls, where glare hides, and where a camera needs to sit to capture faces instead of silhouettes. Get those pieces right, and even a modest camera performs well after dark. Get them wrong, and the best equipment on the market still hands you a gray smear in the middle of the night. Height, angle, lighting, and distance are all choices you control.
Longhorn Security
has spent 12+ years designing and servicing
video surveillance
across the Dallas–Fort Worth Metroplex, TX, and the lesson repeats from ranch gates to suburban driveways. North Texas heat, storms, and mixed street lighting all shape what a lens sees after dark, so every setup deserves a check at night, not just on a sunny installation day. When mounting, lighting, and glare are handled together, the footage finally answers the question that matters at 2 in the morning.